


DeclarativeAdapter-kt
Easiest way to declare RecyclerView Adapters in Android! No more boilerplate code :)
Import
allprojects {
    repositories {
        maven { url 'https://maven.andob.info/repository/open_source' }
    }
}
dependencies {
    implementation 'ro.andob.declarativeadapter:adapter-kt:1.3.1.0'
}
Creating a simple Adapter with one single cell type.
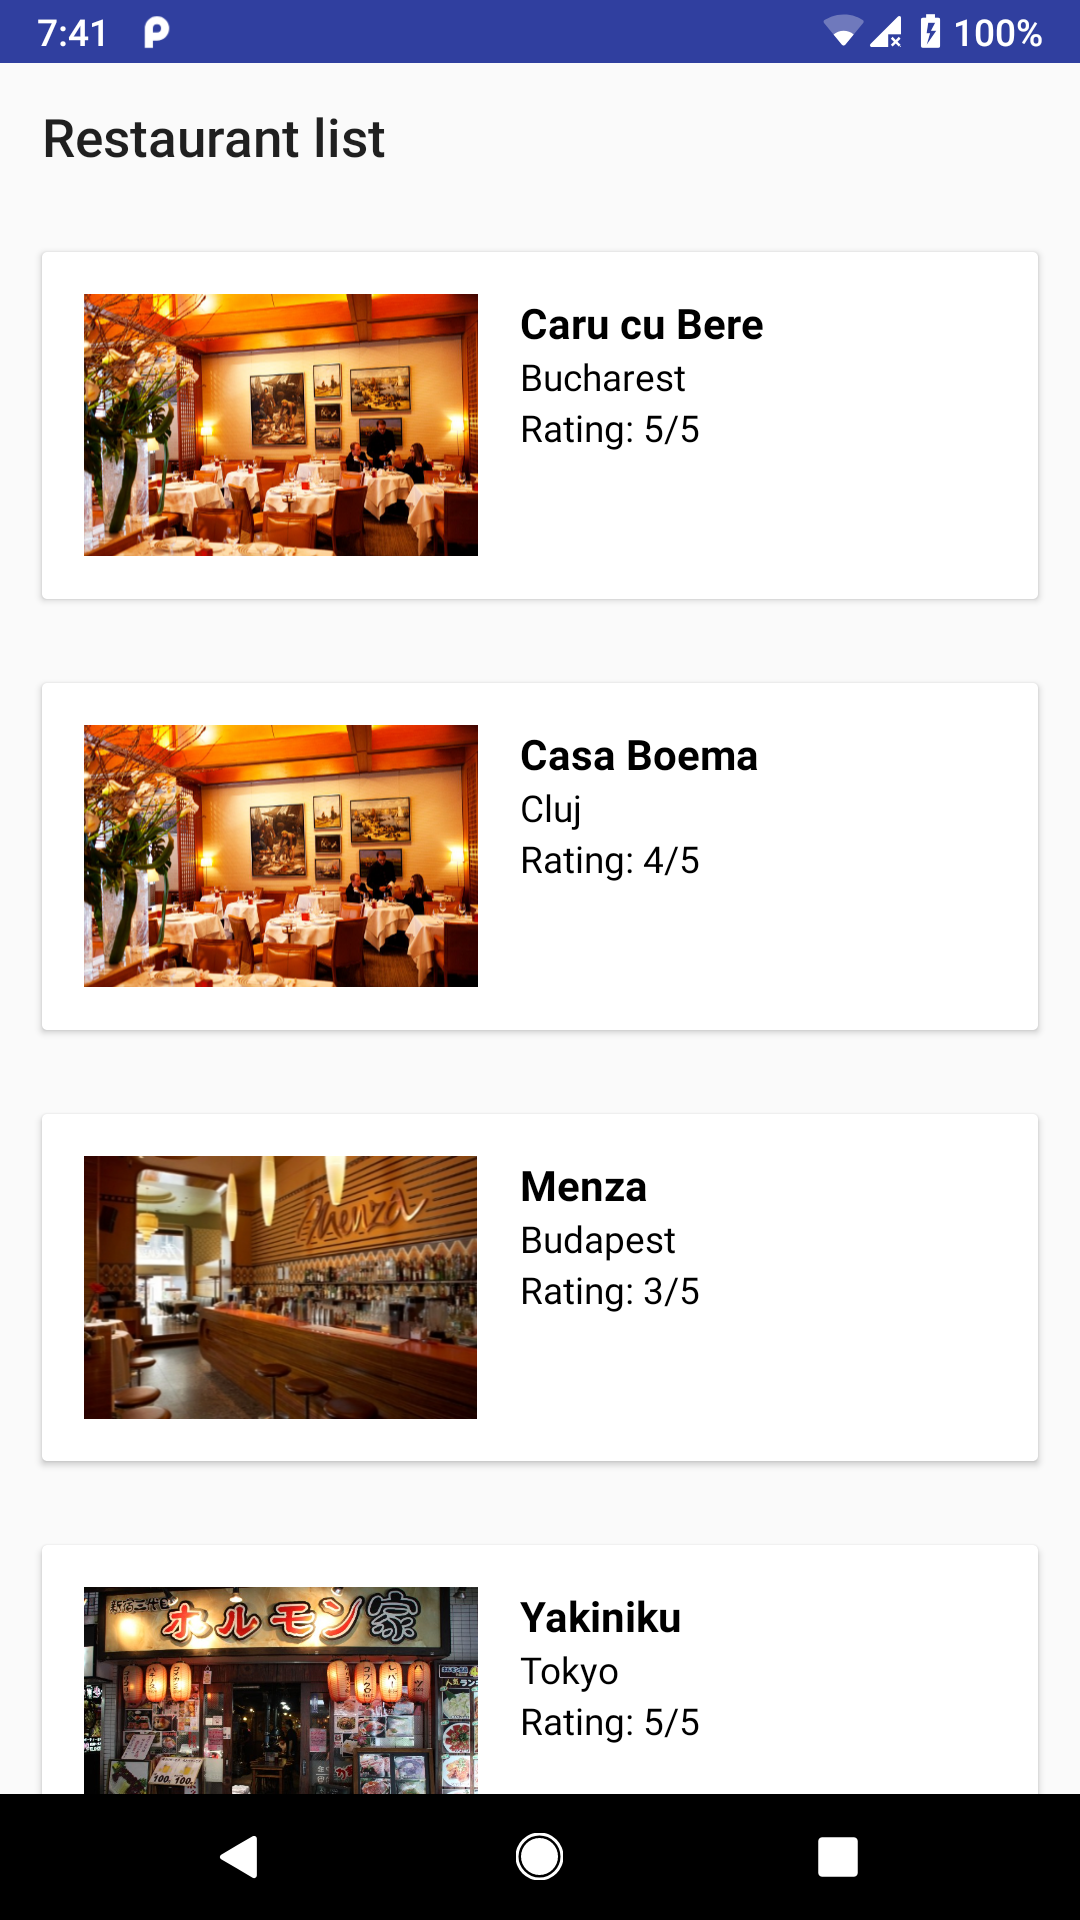
1. Let's say you have a model class:
class Restaurant
(
    val name     : String,
    val location : String,
    val rating   : Int,
    val image    : String
) : Serializable
2. Create a Cell View class representing your row / "item view holder" for your model:
Override the layout method the you specify the layout id used for your cell.
Declare a method annotated with ModelBinder. In this method, bind your model to the views, setup event listeners, etc. Your row will be decoupled from the Activity / Fragment.
class RestaurantCellView : CellView<Restaurant>
{
    constructor(context : Context?) : super(context)

    override fun layout() : Int = R.layout.cell_restaurant

    @ModelBinder
    fun setRestaurant(restaurant : Restaurant)
    {
        Glide.with(context)
                .load(restaurant.image)
                .into(imageView)

        nameTextView.text = restaurant.name;
        locationTextView.text = restaurant.location;
        ratingTextView.text = "Rating: ${restaurant.rating}/5";

        cell.setOnClickListener { view ->
            RestaurantDetailsActivityBundleBuilder()
                    .restaurant(restaurant)
                    .startActivity(view.context)
        }
    }
}
3. Create the layout
Please check that the root element of the layout has height=wrap content, otherwise the row will be full screen.
<FrameLayout xmlns:android="http://schemas.android.com/apk/res/android"
    xmlns:tools="http://schemas.android.com/tools"
    android:orientation="vertical"
    android:layout_width="match_parent"
    android:layout_height="wrap_content">
4. In your activity / fragment, create the adapter:
val adapter = SimpleDeclarativeAdapter { RestaurantCellView(it) }
recyclerView.adapter = adapter
adapter.setItems(provideRestaurants())
Creating a complex Adapter with multiple cell types.
1-3. Create your models and your cells
4. In your activity / fragment, create the adapter:
val adapter = DeclarativeAdapter()
       .whenInstanceOf(Restaurant::class.java,
           use = { RestaurantCellView(it) })
       .whenInstanceOf(Receipe::class.java,
           use = { ReceipeCellView(it) })
       .whenInstanceOf(CommentsHeader::class.java,
           use = { CommentsHeaderCellView(it) })
       .whenInstanceOf(Comment::class.java,
           and = { comment -> comment.createdBy == User.loggedInUserId },
           use = { YourCommentCellView(it) })
       .whenInstanceOf(Comment::class.java,
           and = { comment -> comment.createdBy != User.loggedInUserId },
           use = { context -> CommentCellView(context) })

val restaurantDetails = provideRestaurantDetails()
val items = mutableListOf<Any>()
items.add(restaurantDetails.restaurant)
items.addAll(restaurantDetails.receipes)

if (restaurantDetails.comments.isNotEmpty())
{
    items.add(CommentsHeader())
    items.addAll(restaurantDetails.comments)
}

recyclerView.adapter = adapter
adapter.setItems(items)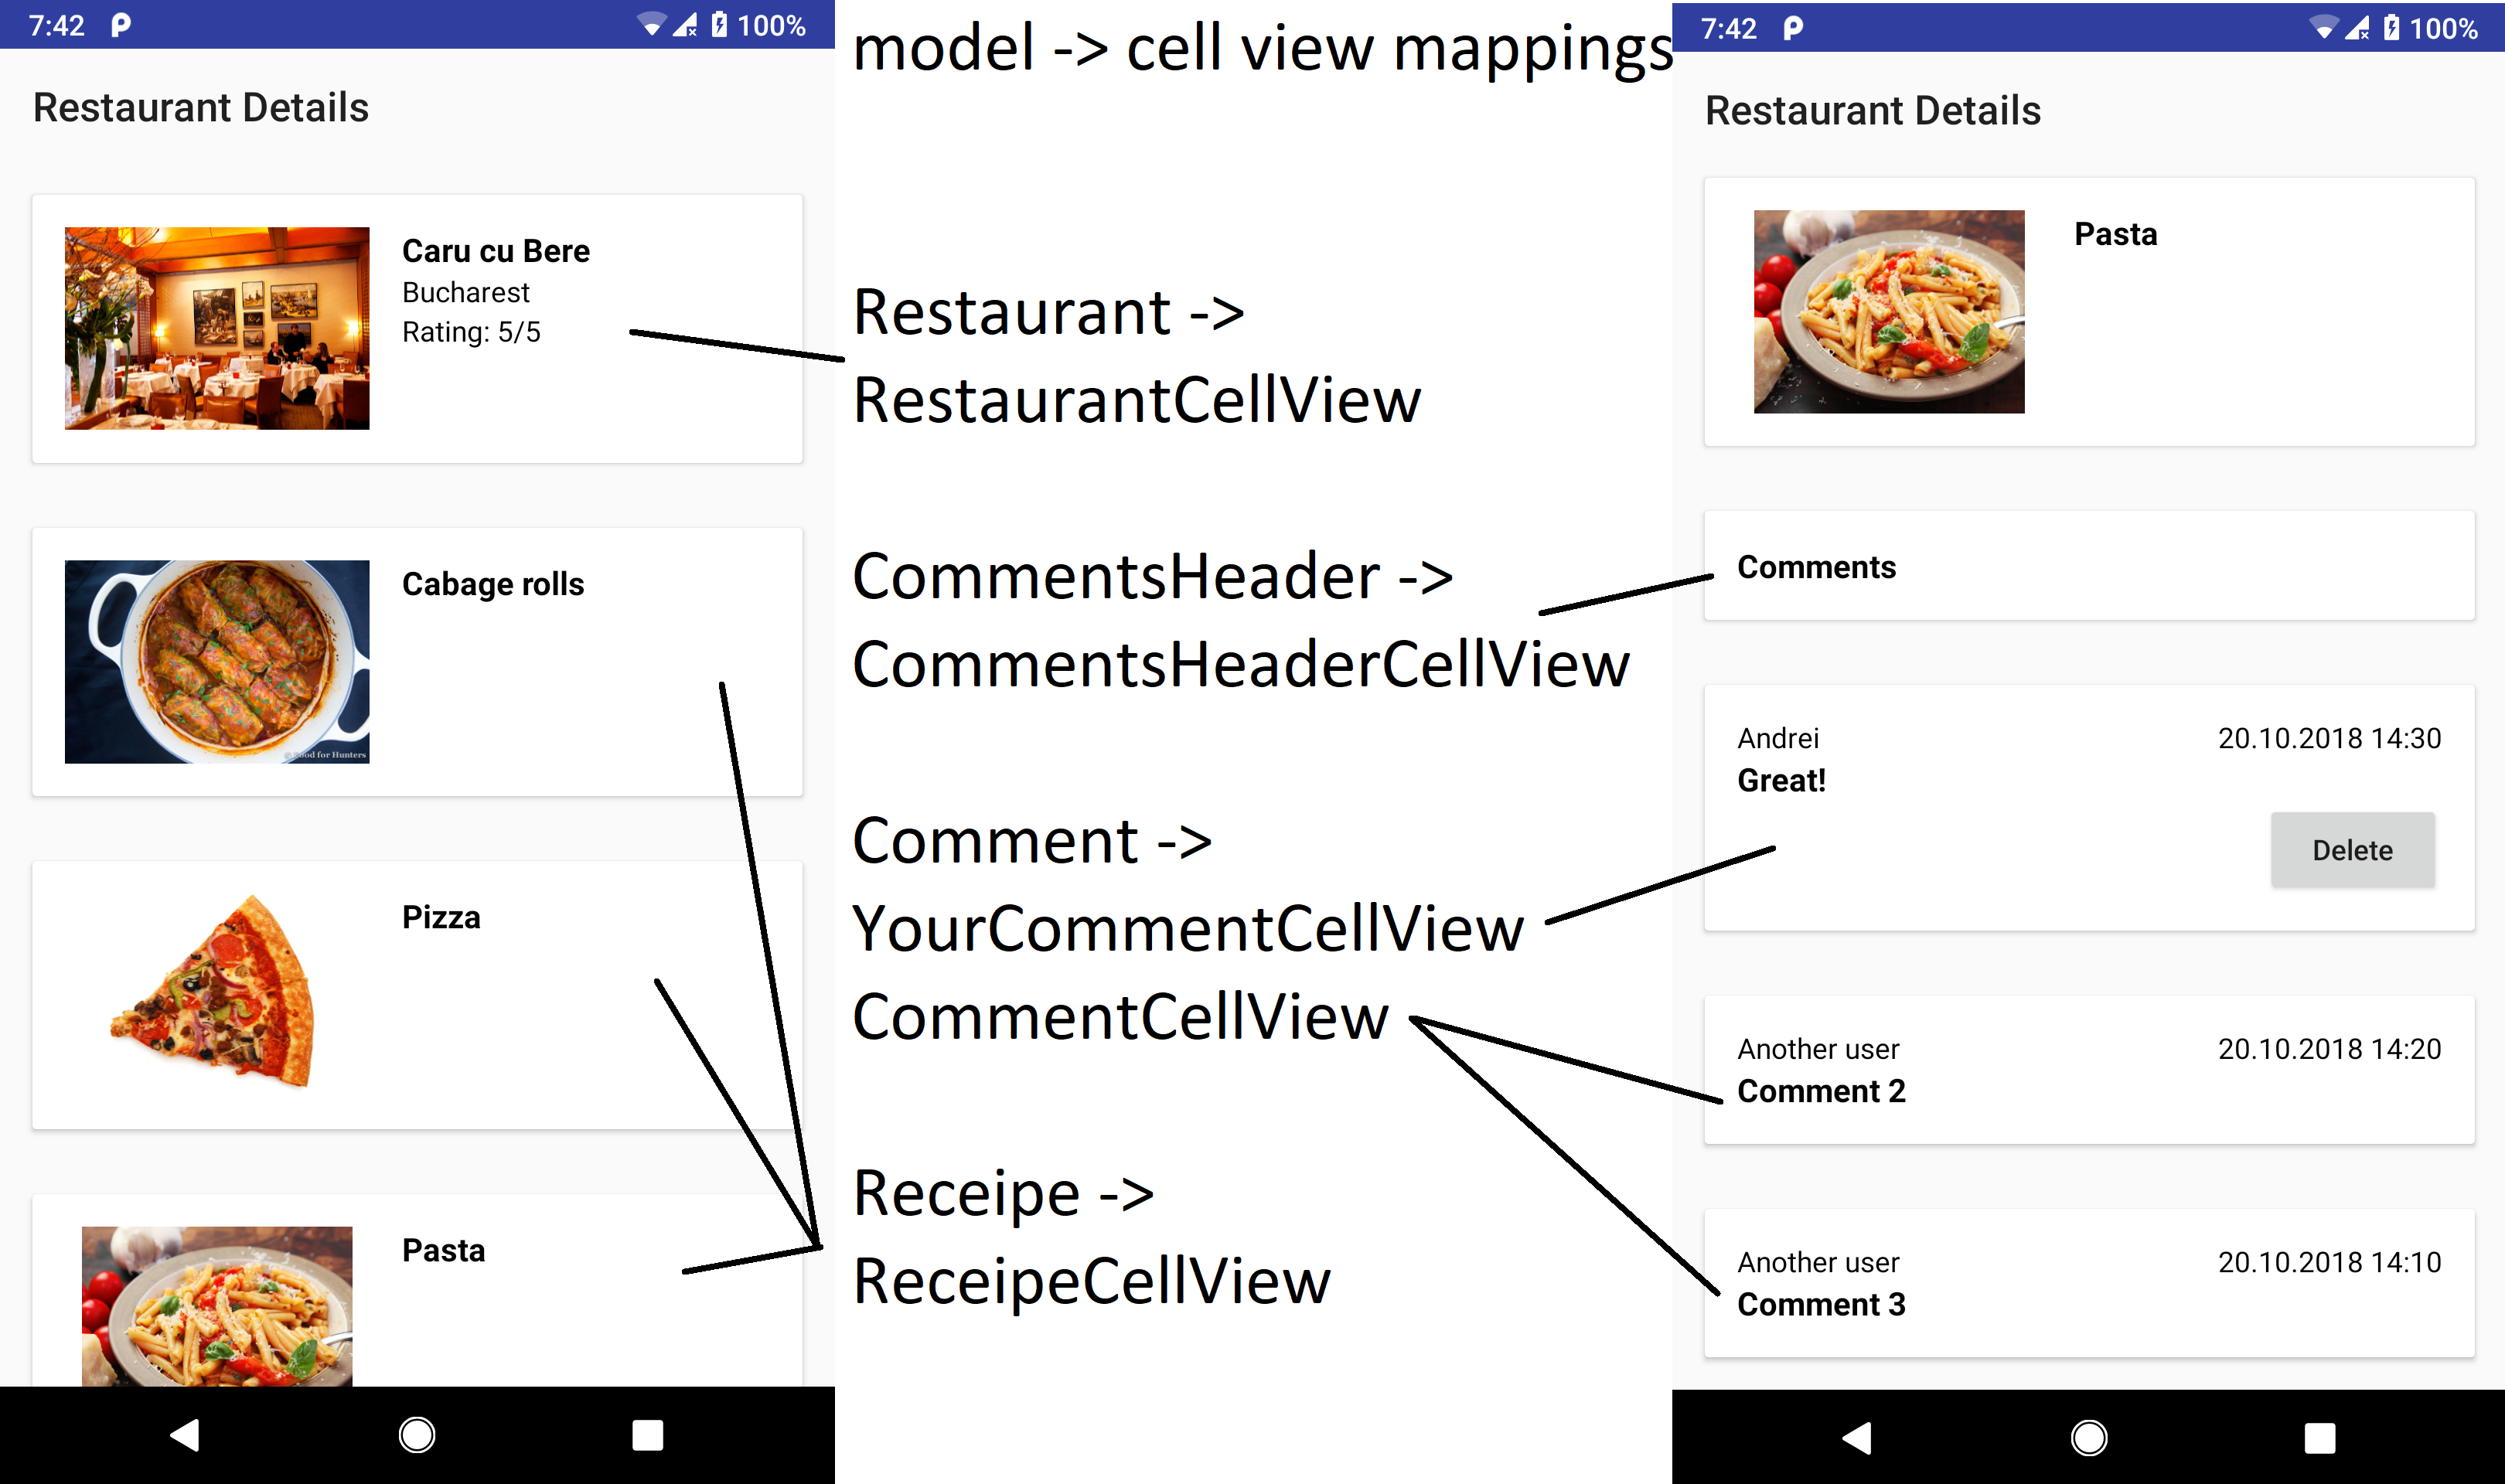
The adapter is created in a declarative fashion, using lambda expressions. A list of items will be used by the adapter, containing the restaurant, receipes, comments header and comments. All these model objects will be transformed into cell views (see the picture above).
Define the way the adapter works by using whenInstanceof (if the model is of this type) and passing a use argument (use this cell view). use taskes a lambda expression that instantiates the specific cell view. Optionally, you can add extra conditions to the whenInstanceof rule, by adding the and argument / rule. With and you can define virtually any rule by using a lambda expression predicate, based on the index and the model.
All the rules defined must cover all the possible usages (for each element in the adapter's items list, must be at least one rule that can be applied).
Why DeclarativeAdapter-kt?
- Single responsibility principle: all the cell view classes will have one single role.
- Decouples your row logic from activities and fragments
- Never write an adapter class again!
- No more boring, unmaintainable boilerplate code!
- Keep all your adapter rules in one concise section of code
Adapter utility methods
The SimpleDeclarativeAdapter / DeclarativeAdapter classes have the following utility methods:
setItems(items: List<Any>)- sets the items and notifies data set changedaddItems(items : List<Any>)- adds more items to the adapter's list and notified data set changedaddItems(index : Int, items : List<Any>)- inserts an item in the items list and notifies data set changedclear()- clears the items from the list and notifies data set changed
More features
License
Copyright 2018-2022 Andrei Dobrescu

Licensed under the Apache License, Version 2.0 (the "License");
you may not use this file except in compliance with the License.
You may obtain a copy of the License at

http://www.apache.org/licenses/LICENSE-2.0

Unless required by applicable law or agreed to in writing, software
distributed under the License is distributed on an "AS IS" BASIS,
WITHOUT WARRANTIES OR CONDITIONS OF ANY KIND, either express or implied.
See the License for the specific language governing permissions and
limitations under the License.`